


Shiny package helps us creating interactive web applications based on R. In this post we will be trying to understand how easy it is to create a shiny app.
What makes Shiny stand out?
There are two features of shiny which makes it easier to create web applications using R. The first is its powerful binding system. They call it Reactive Binding. The way it is defined is that it, not only, can create some output based on some inputs, but, it would re-calculate the output if any input changes. This is similar to excel where we are using some formula for cells. If we update source cells then the calculation is re-evaluated in the target cells. Then it provides useful web widgets. There are a number of widgets for input and output for a web view.

Installing Shiny Package
Shiny package can easily be installed in RStudio from package Install Package tool. It is available under Tools Menu in RStudio. A package can have other dependencies. It gives us options to install all dependencies with the package. I have discussed other options to install a package in R Studio here [ RStudio – Installing Packages]

We can find the package contents in the Documents folder.

Creating Shiny Apps
Shiny Apps consists of a combination of client and server R script. They are respectively named as ui.R and server.R.

Here ui.R is for taking inputs from the user. This would result in input controls to enable user to enter information. The entered data can be added to the input collection which is handed over to the server component. Now server.R receives and processes this and generates meaningful information. They are added to the output collection and handed back to ui.R. This can now be shown to the client.

A ui.R file consists of a page containing various panels. In our example we are using pagewithSideBar. It contains headerPanel, sidebarPanel and mainPanel.
Here we have created a two-file gist. Both ui.R and server.R is included in the same gistId. As we would see later, we can also directly use this to run App without ever copying our code locally. The app is required to receive text inputs. It should then convert the entered text to upper case and returns back to the client in output collection.
The I/O mechanism can easily be understood from the following image. Here the input is passed from ui.R to server.R as input$txt. The server is creating a reactive component for upper-case conversion and returning it as output$upperCaseText. This is shown to the view using textOutput.

Obviously ui.R would be translated into html. For our example, it is translated as the following code. Just look at the javascript files it includes. All the code for interacting with the server is in the javascript code. They styles are defined in the linked CSS files.
Running Shiny Apps In R Studio
A shiny package consists of a pair of server.R and ui.R files. We need both files to run a package.
Running Local Apps
In order to run the application just set the working directory to the folder containing the pair.

Then you can run the following in R Studio.
runApp(“.”)
This should run the files in the current working directory.
Running Packages from Gist
Shiny apps can directly be run from Gist. It must be remembered that, both ui.R and server.R must be part of the same gist. Shiny provides runGist() for this purpose. e.g. for gistId = XXXYYY, all the following three arguments are valid.
runGist(gistId)
runGist(“gistId”)
runGist(“http://gist.github.com/gistId”)
Here we don’t need to provide a complete URI for the gist. Since every gist has a unique Id on github, we can just use the gistId as an argument to the function resulting in the same behavior.
Running Shiny Packages from GitHub
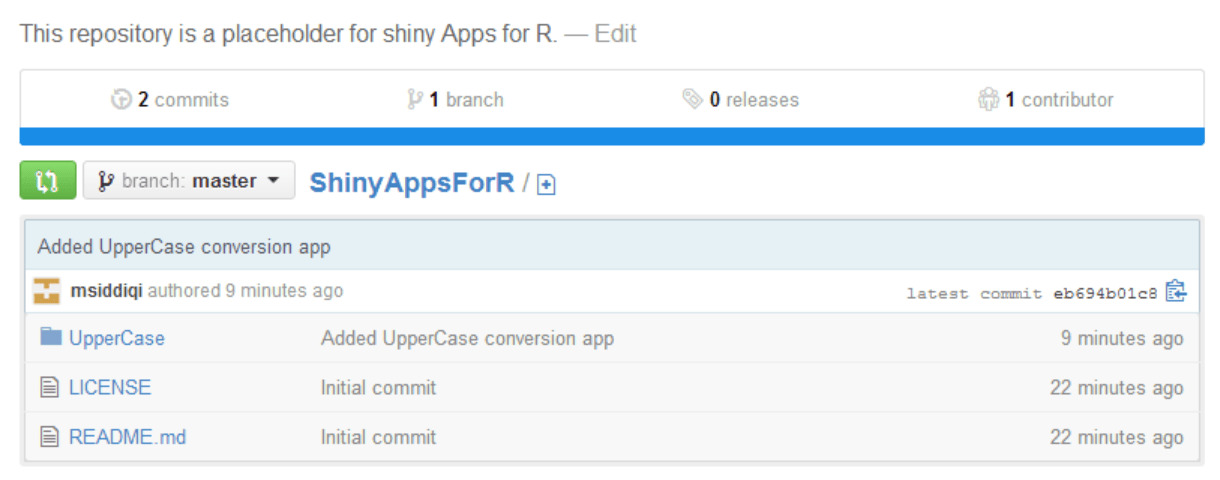
Let’s create a GitHub repository for hosting our shiny Packages. We can keep each app in its own folder. Here we have created a folder for our app for upper case conversion.
We can use runGitHub to run this app from our GitHub repository.
runGitHub(“ShinyAppsForR”, “msiddiqi”, subdir=”upperCaseText”)
Running Zip packages from URL
You don’t even need to host the packages on GitHub. RStudio supports running packages from Url in the form of compressed files. It supports packages in zip , tar and .tar.gz formats. It automatically downloads, unzips and runs the whole package for you. We need the complete path of the online resource as follows:
runUrl(“http://YOUR_URL/FILE_NAME.zip”)
Shiny Package Documentation
A very detailed documentation is provided by RStudio. You can download it from here:

You must log in to post a comment.