Monthly Archives: March 2014

GitHub API & Windows Store Applications in C#

This post started from the thought of pulling user profile information from GitHub and showing it in the form of a GitHub card. Since I could not find any such examples, I thought why not we create an example here at alternatestack.com.

Actually GitHub has long thought about this already. It has provided APIs to interact with GitHub. There is also a C# port of the GitHub API. It was earlier available as GitHub.Sharp. The same API has been moved and renamed to Octokit. There is also a reactive version of Octokit. This is Octokit.Reactive package. The dependencies of the package can be visualized as follows:

octit_reactive_package_dependencies

These APIs can request information from GitHub in authenticated and non-authenticated modes. But there is a limitation of number of un-authenticated client requests per hour. So it is better to make authenticated client requests.

If you would first start going through the API, you would see a lot of XClient types. Nearly all of them are inherited from ApiClient type. If we create a class diagram of these types, then a very inheritance hierarchy seems to emerge. This might make you a little confusing for just pulling user profile information.

GitHubClients

Let’s first create a simple type to support change notification support for our model and view model. It just implements INotifyPropertyChanged interface and provides definition of the required event to support change notification. The interesting point is to use Expression for this purpose. This would enable us to avoid magic string and a compile time check to support change notifications for these types.

Now let us see how we can download a user’s information from GitHub. Here we have already added Octokit nuget package. The model has required properties to hold user information. Now take a look at method DownloadUserInformationAsync. This is an async method. It uses GitHubClient to download a client’s information. Since a user can make any number of requests in an hour, we are creating authenticated requests. The caller is supposed to pass the credentials as arguments. Here we have to await on user information and his repositories’ details. Fortunately Octokit provides async method for both of them. After getting the information, we are just assigning them to the model’s properties.

Now we need to define view model for GitHubCard. It has similar properties as the above model. It uses the model to load a client’s information using async / await. Now we can assign these properties to view model’s ones. This is a perfect place to exploit Automapper. You can add it as nuget package to your project. First we need to create mapping between properties of two types, then we can create a new object from an existing object of the source type. We can also assign values to properties of an existing object based on source type. This is exactly what we are doing here. Since view model already exists, we are just assigning values to its properties using model’s properties.

In the above code, we are calling an async method from constructor. Here we cannot use await with this call as we would need to declare our constructor as async, which is neither allowed nor it makes any sense. Although the code is legal for compiler and would seem to work but it looks like a bad practice. Here we are returning the object (it is constructor after all) even before the object’s state is completely loaded. What if the caller now uses a property which we haven’t initialized yet? How would a caller make sure that the object is completely initialized??

To counter-argue, we can say that this not a regular object but it’s a view model which implements INotifyPropertyChanged. Here we don’t need to initialize the view model object completely but we want to show the view to the user. As object state is loaded, we would be assigning values to the properties. Since it implements INotifyPropertyChanged interface with property change notifications, the view would be reflected with the view model’s state.

resharperMessage

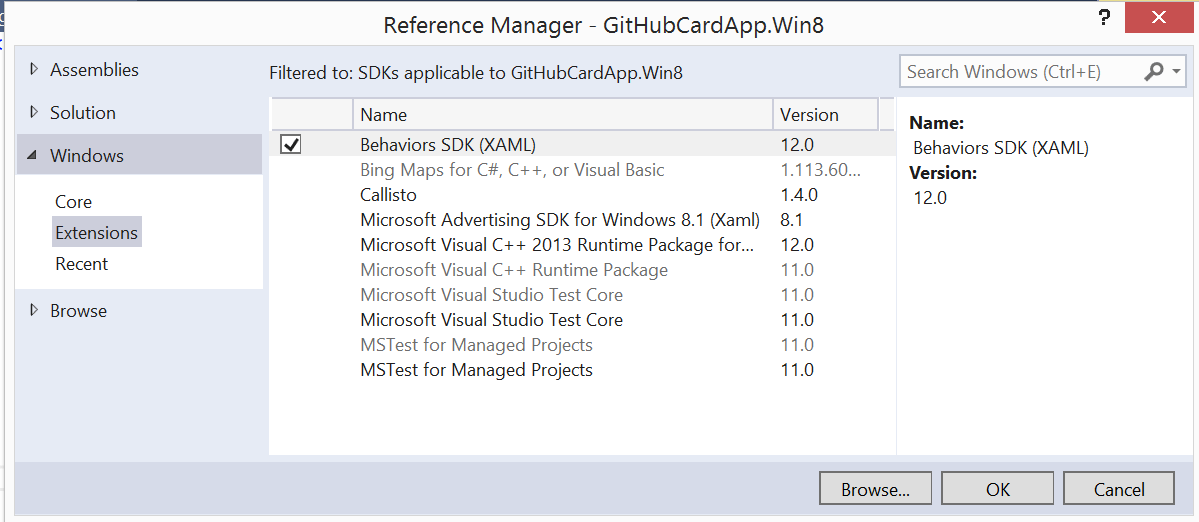
I know you don’t like this. So let’s try to see what we can do. Just to make it more fun, Microsoft didn’t have any support for behaviors in .net for Windows Store Apps. Luckily, they have recently provided an extension SDK for supporting behaviors. This is available for Windows 8.1 projects on Visual Studio 2013. You would still need to add the reference using Reference Manager as follows:

BehaviorSDKXaml

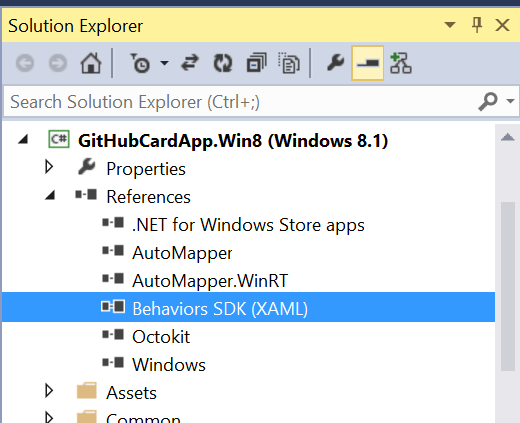
This would appear as follows in the project’s references:

BehaviorSDKReference

Now we can get rid of the call of the method from view model’s constructor. Instead we can introduce an ICommand property with async execute method to call the method used to load user information. Since we don’t have a default implementation of ICommand, we have added Prism’s nuget package for Windows Store Apps.

Now we can use this view model as the DataContext for our view. Here we are using interaction behavior available from the behavior SDK. We can invoke a command using InvokeCommandAction . Here we are using Loaded event in EventTriggerBehavior for this purpose. The rest is regular XAML where elements are data-bound to properties in the view model. Alternatively, we could use Prim’s ViewModel type which has built-in support for OnNavigatedTo / OnNavigatedFrom but let’s keep that discussion for a later day.

Now let’s run the application. We see the following view on display.

AppLoaded

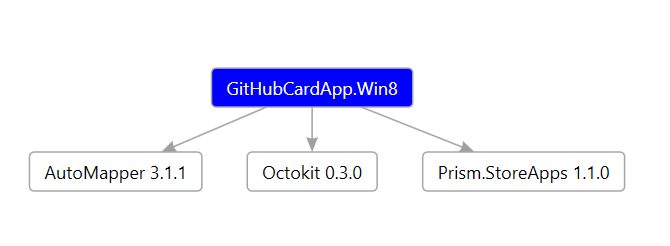
Just to recap on the nuget packages, we have used Octokit.net provided by GitHub. In addition we have used AutoMapper and Prism for Windows Store Apps.

GitHubCardNugetPackages

Get it from GitHub

DownloadGitHubCardApp

Shiny Package for R – An Introduction

Shiny package helps us creating interactive web applications based on R. In this post we will be trying to understand how easy it is to create a shiny app.

What makes Shiny stand out?

There are two features of shiny which makes it easier to create web applications using R. The first is its powerful binding system. They call it Reactive Binding. The way it is defined is that it, not only, can create some output based on some inputs, but, it would re-calculate the output if any input changes. This is similar to excel where we are using some formula for cells. If we update source cells then the calculation is re-evaluated in the target cells. Then it provides useful web widgets. There are a number of widgets for input and output for a web view.

shinyPackage_001

Installing Shiny Package

Shiny package can easily be installed in RStudio from package Install Package tool. It is available under Tools Menu in RStudio. A package can have other dependencies. It gives us options to install all dependencies with the package. I have discussed other options to install a package in R Studio here [ RStudio – Installing Packages]

InstallRPackage

We can find the package contents in the Documents folder.

shinyAppsDownloadLocation

Creating Shiny Apps

Shiny Apps consists of a combination of client and server R script. They are respectively named as ui.R and server.R.

shinyFolder

Here ui.R is for taking inputs from the user. This would result in input controls to enable user to enter information. The entered data can be added to the input collection which is handed over to the server component. Now server.R receives and processes this and generates meaningful information. They are added to the output collection and handed back to ui.R. This can now be shown to the client.

UiServerInteraction

A ui.R file consists of a page containing various panels. In our example we are using pagewithSideBar. It contains headerPanel, sidebarPanel and mainPanel.

Here we have created a two-file gist. Both ui.R and server.R is included in the same gistId. As we would see later, we can also directly use this to run App without ever copying our code locally. The app is required to receive text inputs. It should then convert the entered text to upper case and returns back to the client in output collection.

The I/O mechanism can easily be understood from the following image. Here the input is passed from ui.R to server.R as input$txt. The server is creating a reactive component for upper-case conversion and returning it as output$upperCaseText. This is shown to the view using textOutput.

shinyUpperCaseMechanism

Obviously ui.R would be translated into html. For our example, it is translated as the following code. Just look at the javascript files it includes. All the code for interacting with the server is in the javascript code. They styles are defined in the linked CSS files.

Running Shiny Apps In R Studio

A shiny package consists of a pair of server.R and ui.R files. We need both files to run a package.

Running Local Apps
In order to run the application just set the working directory to the folder containing the pair.

SetAsWorkingDirectory
Then you can run the following in R Studio.

runApp(“.”)

This should run the files in the current working directory.

Running Packages from Gist
Shiny apps can directly be run from Gist. It must be remembered that, both ui.R and server.R must be part of the same gist. Shiny provides runGist() for this purpose. e.g. for gistId = XXXYYY, all the following three arguments are valid.

runGist(gistId)
runGist(“gistId”)
runGist(“http://gist.github.com/gistId”)

Here we don’t need to provide a complete URI for the gist. Since every gist has a unique Id on github, we can just use the gistId as an argument to the function resulting in the same behavior.

Running Shiny Packages from GitHub

Let’s create a GitHub repository for hosting our shiny Packages. We can keep each app in its own folder. Here we have created a folder for our app for upper case conversion.

gitHubshinyAppsForR

We can use runGitHub to run this app from our GitHub repository.

runGitHub(“ShinyAppsForR”, “msiddiqi”, subdir=”upperCaseText”)

Running Zip packages from URL
You don’t even need to host the packages on GitHub. RStudio supports running packages from Url in the form of compressed files. It supports packages in zip , tar and .tar.gz formats. It automatically downloads, unzips and runs the whole package for you. We need the complete path of the online resource as follows:

runUrl(“http://YOUR_URL/FILE_NAME.zip”)

Shiny Package Documentation

A very detailed documentation is provided by RStudio. You can download it from here:

shinyDocumentation

RStudio – Installing Packages

We can extend the features provided by R using packages. In this post we are going to discuss various options to install packages in RStudio.

Install Package Tool

A package can easily be installed in RStudio from package Install Package tool. It is available under Tools Menu in RStudio. The package can have other dependencies. It gives us options to install all dependencies with the package.

InstallRPackage

Installing R Package from Packages View

We can also install a package directly from Packages view. We can navigate there using the following menu. You just need to check the check box for the package and it loads the library. These are the packages which are already installed. For installing new packages, just select the Install Package button at the top, which should open up the same installation dialog.

InstallPackageFromPackagesView_001

Installing R Package from Console

And finally we can install them directly from console. Here we are using install.packages to install a package. Since I already have shiny installed, I am using a different package to show you how exactly it is done.

installpackage_console

Package Download Location

By default, these packages are downloaded in your Documents folder.

packageDownloadLocation

Category: R

Expression Evaluation using R Hosted in C# Applications

R has become an industry standard for statistical computations. It is natural to wonder how we can use it from our .net applications. Definitely, this quest have landed you here. Let’s begin…

Setting Up R On your Machine

In order to run R script, we would need R runtime to be installed on the machine running the process. We can download it from CRAN. You can use the following link:

DownloadR303

You can find the installation folder under Program Files directory. The exact directory would definitely depend upon the version of R being installed. Here we have installed version 3.0.3 of the library.

InstallationFolderR

Since this would require the installed R libraries on your machine, it needs to know the installation directory of R. In order to keep your life simple, you can just add bin\{platform} path to PATH environment variable.

PlatformPath

Installing R.Net

There are a number of options for C# projects to interact with R. Here we are introducing one such option. This is R.Net. This is open source project available on CodePlex with New BSD license. For easier integration with .net code, it is also available as a nuget package. Here we are installing the nuget package with Nuget Package Manager Console tool.

InstallRDotNetNugetPackage

Just a semantic issue, the parameter to Evaluate engine is called statement. Generally, a statement is not expected to return a value. Since this would result in a value, let’s keep calling it as expression in our language.

Evaluating Scalar Expressions using R Engine

Let’s first have a look at how we can use R for scalar expression evaluation. Since this should involve no parameters, we can also use memoization to improve performance. Here the method is using REngine from R.Net. The engine is using R’s eval feature for expression evaluation. It needs to specify that the expression is needed to be parsed from text before handing it over to eval. Here we are assuming the result as numeric.


Now we can use this method from Main method of our Console application. This is just passing the expression as string. After receiving the result back, it just prints it to the console.

Passing Variables and Expressions

Now what happens if the script requires a parameter. Let’s assume an expression with a paramter [“5 + NUM * 2 – 2”]. Here the script has NUM as a parameter. In the following, we are passing the list of parameters in a Dictionary<string, SymbolicExpression>. We are using the parameters to set symbols in the engine. We are using the expression similarly as the previous example.

Since we know the required list of parameters for the script, we can create a Dictionary of symbols. This is the same collection used by the above code to set parameter symbols.

Download Code

Category: R Tags:

Wireframing Mobile Apps

When we think about an idea, it is generally very vague. We do know what we want but we have no idea how an application would accomplish this. It is best to sit down and try to think about an interface which should accomplish our desired requirements. App Wire-frame represents the skeletal framework. It lists the layout of an app and various transitions.

But before start wire-framing an app, we need to select a wire-framing tool to accomplish that. The market is filled with numerous tools. Now you might be thinking, it would just be a pen and a canvas allowing you to draw. Actually wire-framing apps are a lot more than that. They allow you to design a complete layout of an app. You can then just pass it on to a development team. Since this is very detailed, this is generally achieved by off-shore development team. This works even better if you are tight on budget. And who isn’t?

Idea to App

Idea to App

Is It Wire frame / Prototype Or Mock up?

Before taking an idea further into the process, you might start hearing these terms from people around you. They would refer to these terms and you think they just are synonyms and people just want to impress you with their vocabulary. Well they might, but although many people do use them like that, they are different terms having some differences. They are actually different models of the same end-system communicating different details about the App-To-Be (I think this is a cool term for this).

As I discussed they have different models of the same system. We are looking at the same system with different sets of details. But the main purpose of all of them is COMMUNICATION between stakeholders. They are based on the idea, A picture is worth a thousand words.

Wire frames are Black ‘n’ White and Gray sketches you might have seen before. They are low fidelity and should have very low cost. Here representation is more important than presentation. It represents the information presented on the interface. Since they don’t have fancy colors, they should be fast to design. Generally, it takes a lot of time to get a buy-in from stake holders.

For mock-ups presentation is also important but they are static visualizations of the interface. They are medium to high fidelity designs with costs between wireframes and prototypes. They are colored so they represent the exact presentation of the screen. Once a mock up is ready, it should be religiously followed by development teams.

Prototypes are the interface skeleton of the App. Here both presentation and representation are important. Although fake data is displayed on prototypes, they are interactive in nature. They represent the exact flow as the real App. They are also medium to high fidelity and costliest of the three.

Here I have created a Wireframe for an App. Let’s name it as GitHub Card App.

App Wireframe

App Wireframe

I have created this wire frame using balsamiq. You can download the project definition. It is a great tool. You can download a 7-day trial version here:
balsamiq

Factors to consider:

There are numerous tools in the market claiming the ultimate. I thought it would be a good idea to think about the factors I would consider to select a tool for such purpose. Let me list them here as it might help someone else too.

Widgets & UI Library
It must provide all the controls supported with the selected device. On top of that, it should also provide any widgets and custom controls to make it easier to create a more meaningful UI wire frame. This also includes integration with maps and video platforms e.g. You Tube.

Wireframing Platforms
There are various wireframing applications. The applications, running locally, must be identified with the supported platforms. These platforms are for the wireframing applications themselves and not the end-application. It includes operating systems and devices running the wireframing application.

Feedback on Design
You might remember discussions and ideas getting lost in the emails. Since there are so much back and forth communications at this stage, it is best to keep all comments and notes at the same place as design. This would clear out the context of the comment. Any team member should be able to tag any suggestion / comment to any area of the design. They should be searchable. They might be different types including suggestion, Gold Plating, etc.

We should be able to identify the project areas and assign different rights to certain roles. We don’t want to share all the information for everyone, at least, until it is in a share-able format.

Version History
Not only the designs are continuously evolving, sometimes, we need to go back to an earlier design. This is only possible if we are keeping control of the versions of our design.

You can also use tools which provide version histories by default e.g. DropBox supports version histories. You can use DropBox for sharing between different stakeholders. Since DropBox already supports version histories, you don’t have to worry about it at all.

Pricing Plans
This is the first time I have seen something like this. It seems there are many wireframe / mockup tools which don’t provide any details on the pricing plans. They just ask for signing up and trying them. This seems awkward as price is one of the biggest constraint and could cause a big wastage of time if prices don’t fall in our range.

Although many of the tools are paid, there are trial versions available as well. There are also Free Editions for the paid tools with limited features.

Input Formats
Most of the tools require sketching and dragging / dropping items to create a design. But You might be sitting at a coffeeshop when you get an idea. You can draw it on a piece of paper or a napkin. Does your tool allow you to use this? There are tools which provide primitive support for that. They also allow adding links and navigation among those screens.

But the tools I have found, they don’t convert it to an mobile look and feel and the app is always in some sketches. It can be better than that and convert it to an iphone look and feel.

Linking screens and transitions
For developing a prototype, we need to simulate transitions between screens. The tool should allow us to define various screens and kind of workflow between screens. It should be able to identify the triggering actions for such transitions, plus the constraints. We should also be able to record the transitioning effects.

Simulators are a great app during development of an App but they can be deceiving. It is best if the tool also allows testing your app on an actual device but the simulators are generally very useful.

Documentation & Technical Support
The tool must provide extensive and user friendly documentation in order to understand the tool. But if you think about it, there are trade-offs, how many hours of training did you have to go through when you first got your smart phones? Why do these tools have to be any different than that. If a tool requires big documentation, it might be a bad thing. It should be intuitive enough for the user to figure out his way.

There is nothing better than good technical support though. Talking to a real human when something doesn’t work as you intend, is always great help!

Regular & Frequent Updates
Things have a chance to improve as frequently as they are updated. The tool should not be dead. It must be updated regularly to add new features and fixing defects. Before choosing a product, just see how many versions and fixes were released last year.

Available Tools

We have already discussed about Balsamiq. It is a great tool to design wire frames. There are a number of tools used in the market. I am listing some of them here. They support designing wire frames / prototypes and mock-ups for Apps.

Fluid UI
Fluid UI is used by a number of Fortune 100 companies including DELL. Although there is also a free version but this looks only good for playing and getting experience with the tool. For a commercial ready application, it would be necessary to upgrade to a paid account.
fluid

App Cooker
A mockup tool for creating iOS App mockups for iPhone and iPad.
appcooker

InVision App
This looks very promising and seem to have nearly all the options we just discussed.
invision

JustInMind Prototyper
justinMind

proto.IO

proto IO

protoIO

https://popapp.in/
popapp

Verifying Google Analytics Set up for WordPress

WordPress is the most famous CMS (Content Management System). This is the CMS of choice for various reasons:

  1. This is free
  2. There are countless plugins and widgets
  3. Php

Now when we setup a new website, we need to see the analytics data to determine how our targets are being achieved. In order to setup the wordpress website for analytics, we can follow the following steps.

Setting up Google Analytics Account

We need to first setup analytics account. By the end of account creation, we should have a tracking code in the format of UA-XX….. We will be needing this in the next step.

Google Analytics Setup

Use Tracking Code on the Web Site

Now we need to connect our website with the Google Analytics account created above. The account creation makes it easier for us by providing some code we can add to our site. The code is in PHP. We need to add this code to a php file and include it in the page. It is good to add this to a part, which is included in all page displays (e.g. header / footer). This would save us from adding it on every page.

For a wordpress website, the community has developed a number of plugins for this purpose. They, not only, allow us to insert the analytics tracking to the website, but they also allow us to view the analytics data in the dashboard. There are a few plugins which makes the latter as optional. Here we are using Google Analyticator for this purpose.

Analyticator

Verifying Tracking Code

The easiest method of verifying the analytics setup on your website is using Google Webmaster tools. In order to use the tools for your website, we need to verify that we are the legitimate owners of the website. One of the options uses Google Analytics Tracking code. Since we have already inserted the tracking code there, it can just verify that the website is using the tracking code as attached to your account.

In order to verify if the plugin adds the tracking code successfully, we can view the page source of our website. To verify if the site is successfully providing tracking data to Google Analytics, we can use Google WebMaster tool. Here there are a number of options to verify that you are the owner of the website. One of the option is to use Google Analytics.