


In this post we will be proceeding with the app development for our GitHub Card App. Here we are targeting android audience. This is the wire frame we designed for our card App.

App Wireframe
Since this is a wireframe, we don’t have to match it exactly but we will try to keep the layout as close to this as possible. It would be tricky to get the number of total commits so we will be ignoring this for now.
GitHub API
GitHub provides users’ and repositories’ data through REST based HTTP services. It is currently version V3 of the API. The details about the api can be found here [https://developer.github.com/v3/]. We can test our requests using Curl as follows:

Creating GitHub Contributions Android Project
Let’s use Android Studio for our development. You can download the tool here. We are naming the project as GitHubCard.Android. The project is being targeted for API 19 (KitKat).

Here we are using a clipart as an icon for the app. Let’s pick a simple clipart from the gallery.
![]()
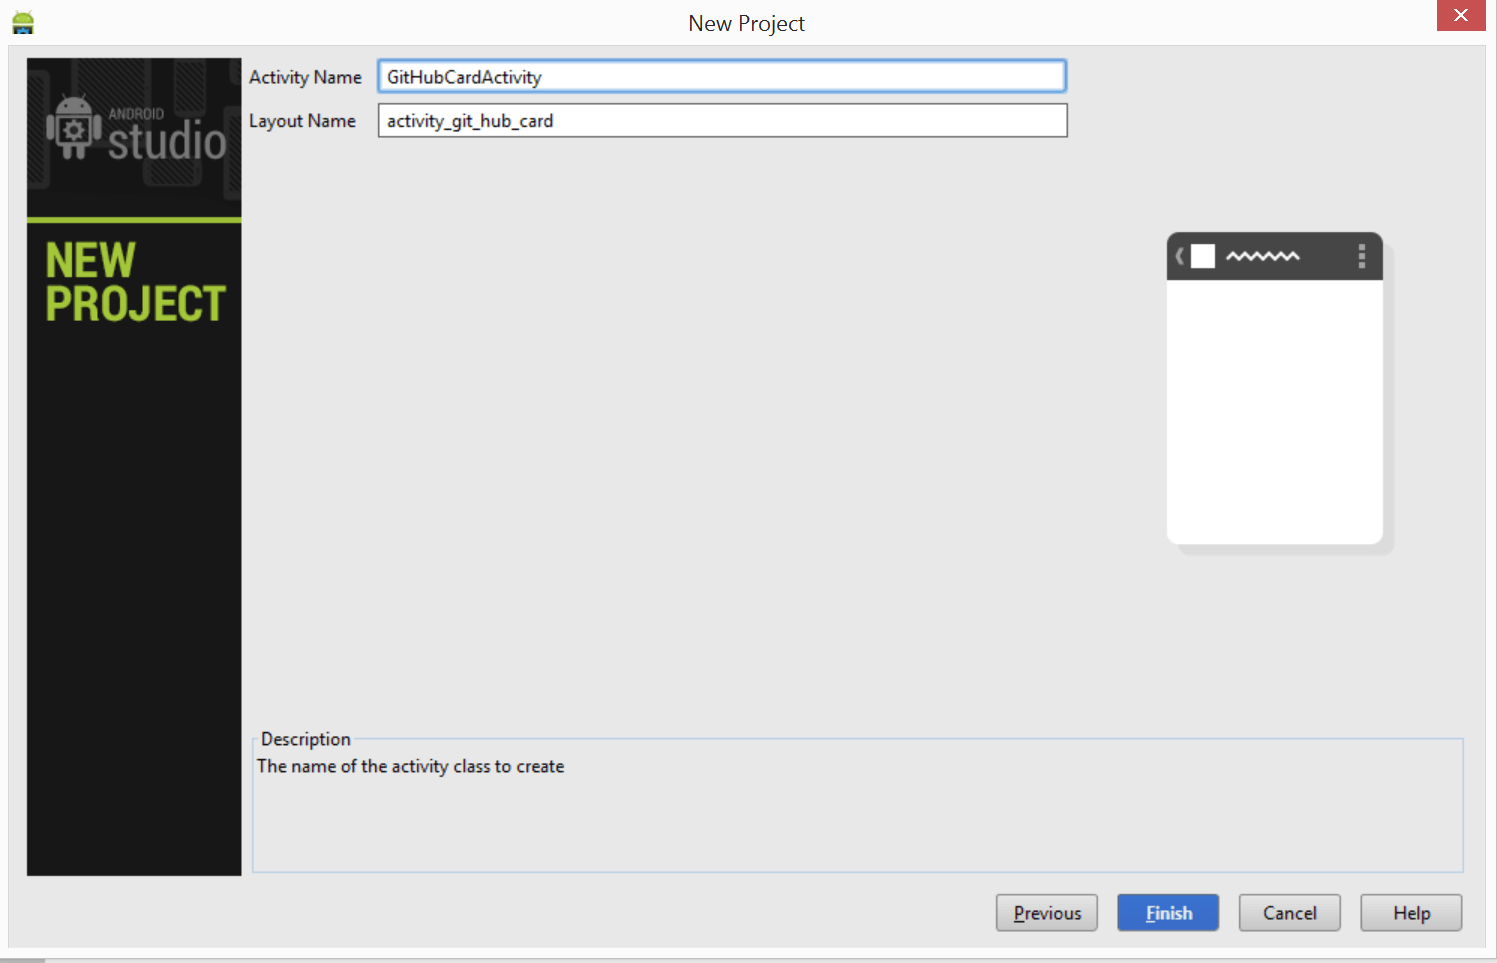
Since we selected the option “Create Activity” in the first page of the wizard, we are asked about the type of the activity. Let us select a empty activity.

Now we need to specify the details about the activity. It includes activity and layout name for the activity.
And that completes the wizard, we have our project created in the workspace. It appears as follows:

There are two folders which are of special concern. They are src and build folders. Here src folder contains project’s code including layouts. The type “R” is of special importance in an Android project. We can find it in build folder.

Android Permissions
In order to access GitHub user profile and repository data, we need to have access to internet. This would require our app to require permissions to access the network. We need to declare this in AndroidManifest.xml of the app.
What is Activity in an Anrdoid App
Activities define the interface display for an android app. Its layout and behavior are defined separately. We can define a layout for an activity or an app widget. If you are coming for a XAML background like me, you must be used to define the application view in XML. The mapping of an activity layout to an activity is defined in activity definition using tools:context. Here tools is the namespace, “http://schemas.android.com/tools”. In the java code we can define the content-view for the activity of interest. Here we have the onCreate() definition of our card activity.

So anything we want to show on the UI, we create an activity for that. As we just discussed, an activity is bound to a view defined in XML so technically, we can bind more than one view to an activity but this is generally not recommended. There are a number of overloads of setContentView method.

An activity has a single thread i.e. UI thread. The activity currently being displayed is referred as Active. Creating multiple activities doesn’t create new threads as only a single activity is active at a given time.
Activity Designer
An Activity can be mapped to one or more layouts. These layouts are defined res/layout folder for an android project. We generally specify the layout of an activity using setContentView method in onCreate method.
This is like Microsoft’s XAML technologies where views are defined in XAML, which is based on XML. The behavior is defined outside the layout definition in view models. Android layout is also defined in XML. For convenience, we can use the Activity Designer, which makes it easier to generate this XML.

Double clicking a widget enables us to change the orientation and Id of the selected widget.

This is the layout definition for our GitHubCardActivity. It is a simple layout with a few TextView(s) (for name and other info) , ImageView (for profile picture) and ListView (for showing the list of user’s repositories).
You can notice the strings being referenced as strings/id. This is a reference to strings.xml containing the definitions of these strings. We can find the file in res/values folder.
Downloading Profile and Repositories Info
Downloading the profile and repositories info for the user is the most important part of the development for this app. Let’s first create an interface type to hold information for user’s profile data. We are naming the type as GitHubProfileDetails.
And here is the interface type to download profile and repositories data. Since we would be accessing the network, we might need to handle IOException cases. All the data is returned in JSON format by default. We might run into issues while formatting the JSON data causing JSONException. The calling code must handle these two exceptions.
Here is the implementation for GitHubProfileDetails. Here we are using the URL from the profile data returned to download user’s profile pic. Just make sure that this is being constructed on a non-UI thread as we cannot access network on UI thread in android.
And here is the implementation for GitHubProfileDetailsDownloader interface. Since we can use different approaches to download this data. We are deliberately keeping this type agnostic to the particular approach used. The profile’s data is downloaded as JSON. Here we are parsing JSON and creating a GitHubProfile instance. Similarly we are getting the repositories’ data and returning it to the calling code.
GitHub Repositories List
In order to show the list of user’s repositories we are using ListView. This is used to display a list of scrollable items. This is how we are defining it in activity_git_hub_card.xml.
Please notice the id here. We will be using the same id in activity definition to access the element to bind it to user’s repositories data using R type.
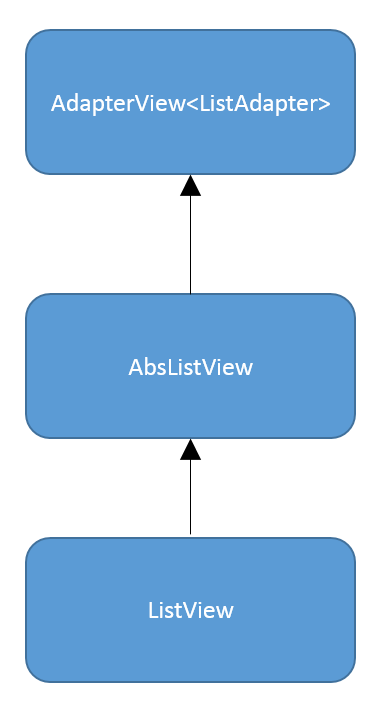
In android, we use Adapters to bind data to ListView. It also provides sorting and filtering capabilities. Let’s look at the inheritance tree of ListView type. All elements which inherit from AdapterView can use adapters. From the definition, we notice that it supports ListAdapter, which is an interface type. Based on Liskov’s substitution principle, it must also support all implementations of the interface.
Here is the code, we are using to create an ArrayAdpater from the data returned by GitHub API. Since we are just interested in the name of repositories, we are just passing them to this method. After creating an ArrayAdpater for the data, we are just setting the ListView’s adapter.
Just note that we have added this method in GitHubCardActivity. We also need to make sure that the method is being called on UI thread, which is obvious here since we are calling it from onPostExecute of AsyncTask.
Loading Image from GitHub Profile
ImageView doesn’t allow directly setting a web Uri to load image. We need to explicitly load image and assign it to the imageView source. We should remember that we are required to download this in a non-UI thread to avoid the InvocationException. Here we are using URL to create an HttpConnection with the image source. We are then getting the InputStream from the connection. BitmapFactory allows us to create an Bitmap from an InputStream.
Since URL’s constructor can throw a MalformedURLException and HttpConnection.getInputStream() can throw an IOException, we need to catch them.
After downloading image and other profile data, we need to show them on UI. In this method we are providing the data using GitHubProfileDetails type. Since we need to show name, blog, date of creation and number of followers’ data in a certain format, we are using String.format for this purpose. ImageView cannot use a web URI, so we have downloaded the whole bitmap, now we just need to set the bitmap as the profile picture.
AsyncTasks for Profile and Repositories’ data
Since we need to download data on a non-UI thread (because of android’s restriction of network access on a non-UI thread) and populate UI elements on a UI thread (android’s restriction for accessing the UI elements only in UI thread), AsyncTask is ideal for this purpose. We can download the profile data first, get URL for repositories and then download the repositories’ data. But since the URL for repositories’ data is also standard one, I think it should be fine if just directly use it and download this in parallel to the profile data.
Below we have introduced two AsyncTask (s) to download user’s profile and repositories details. If you are coming from a Microsoft’s background, AsyncTask (s) are very similar to BackgroundWorker. They allow some processing to be done on a background thread. During the processing, we can report progress of the operation which can be used to update UI. After completion of task, it executes onPostExecute() method.
Unlike Microsoft’s BackgroundWorker, it doesn’t provide any event for progress publishing and task completion but it provides other overridable methods for this purpose. This makes it difficult to pass the data to the UI Activity which can be fulfilled by providing callbacks. Here we are providing two child types for AsyncTask. We are expecting the GitHubCardActivity to be passed as constructor’s arguments. We are using the provided instance to use callbacks once the required data is available. In the callbacks (discussed above), we are updating the UI.
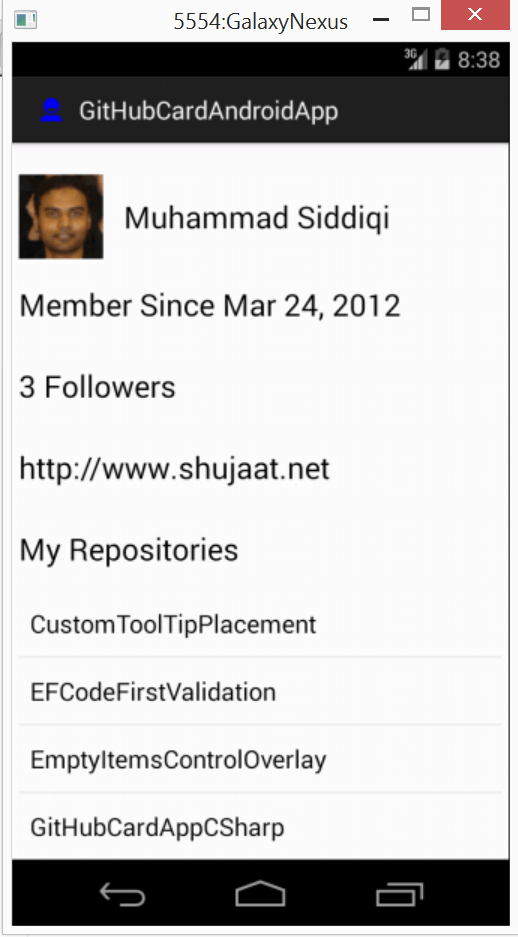
Running App
Now let us run this app. We can use a virtual device for running this. Here we are using Galaxy. This is the output of the app.
Download Code
You can download the app from GitHub.


