


In this post we are going to discuss how we can install and configure AWS access from Visual Studio. Here we are using Visual Studio 2013. Amazon has provided a Visual Studio extension for this purpose. We can either download it from Extension & Updates dialog from Tools menu or directly from Visual Studio Gallery. It is also available directly from Amazon Web Services page.
Visual Studio Extension
The extension also includes AWS SDK for .Net. The SDK includes project templates for creating new projects. It also has class libraries which can be referenced in existing projects. It can be used to develop applications using Amazon EC2, Amazon S3, Amazon Elastic Beanstalk (EB) and Amazon DynamoDB. It also includes AWS tools for Windows PowerShell. It seems that we can also download the SDK separately.

We can find three project templates in the create project dialog for Visual Studio. The dialog is available when we create a new project. The available templates can be used to create AWS web client and console projects. There is also a template to create empty project. It adds the assembly reference and App config without any significant code added to Program.cs file. Additionally, there are various samples available as project templates. You can use them to learn different features of SDK.

Selecting a project templates for a project shows an additional dialog if we don’t already have specified our credentials. If we want to add the security info later on, we can select skip here.

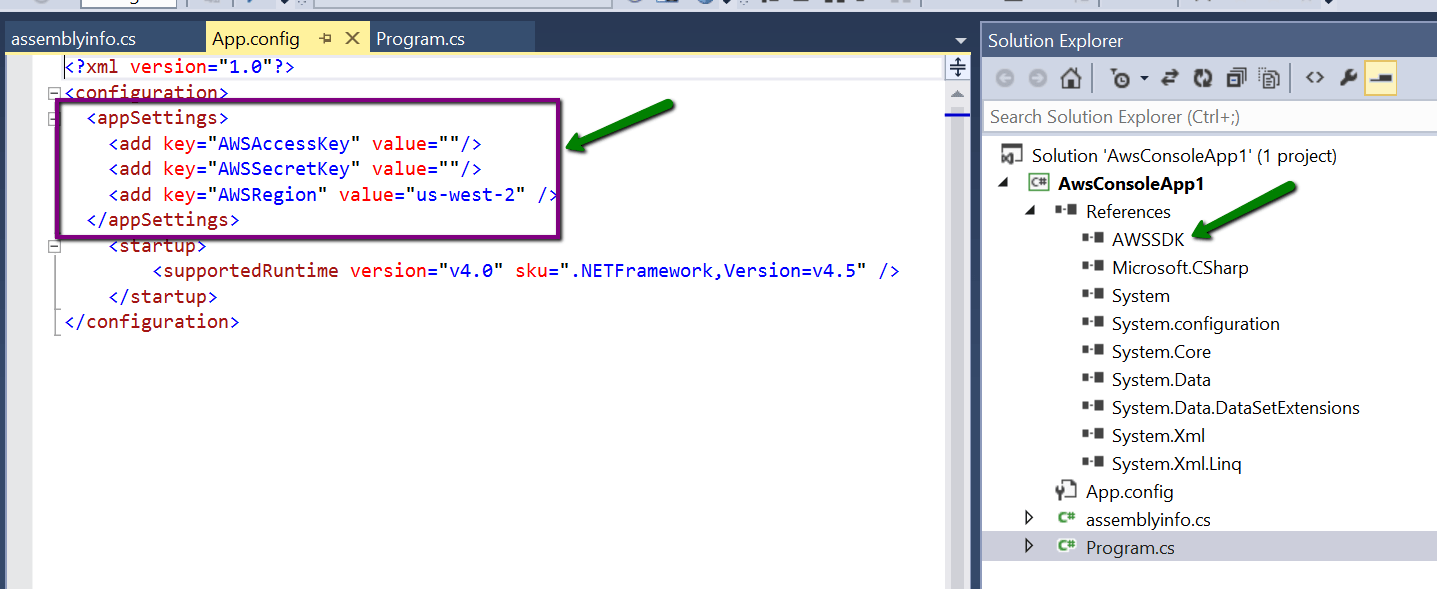
A sample AWS console application has a reference for AWSSDK assembly. Additionally, it has some required configurations added to App.config file. Here AWSAccessKey and AWSSecretKey configuration settings are automatically used by the default factory to create IAmazonEC2 client instance.
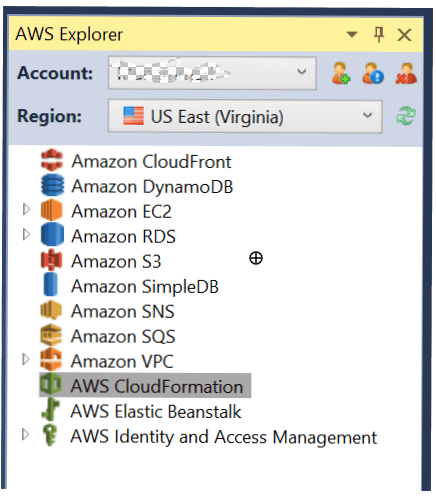
AWS Explorer
AWS Explorer is available under View menu in Visual Studio. Selecting the menu item should open AWS explorer. Like other tool windows, this is a dockable windows so we can keep them with Solution explorer window.

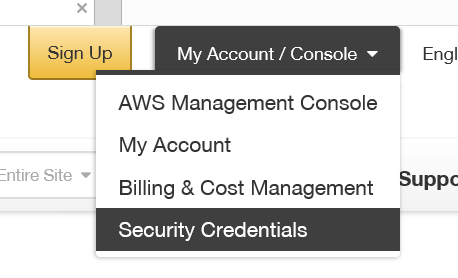
Now we need to enter credentials to connect with our AWS account. The security credentials info can be found under My Account section in your only AWS view.
We can add multiple accounts to AWS Explorer. Just hit the Add button alongside the account list to add a new account and the following dialog is displayed. You need to create access keys from the page.

Add the information from Security credentials page. The other required details are also found on the same page.

After providing the above details, we should be able to see the services list as follows:
Eclipse Plugin for AWS
There is also an Eclipse plugin for Amazon AWS.

You must log in to post a comment.