Author Archives: Muhammad

Kafka Connect – Externalizing Secrets – KIP 297

Kafka Connect – Externalizing Secrets – KIP 297

In order to connect with a data source or sink, we need to use credentials. Kafka Connect added support for specifying credential using config providers. The support for file config provider is available with the installation package. This is discussed in KIP 297. The KIP was released in Apache Kafka 2.

https://cwiki.apache.org/confluence/display/KAFKA/KIP-297%3A+Externalizing+Secrets+for+Connect+Configurations

Here is the JIRA.

https://issues.apache.org/jira/browse/KAFKA-6886

Changes in worker properties file [etc/schema-registry/connect-avro-distributed.properties]

Fix to mask passwords from REST interface:

Since the connectors are exposed through the RESTful service from Connect, the user credentials will be returned as a response. An additional update was required to fix this. This was worked as KAFKA-5117.

https://issues.apache.org/jira/browse/KAFKA-5117

KAFKA-5117

KAFKA-5117

The fix for RESTful service was released in Kafka 2.1.x.
https://issues.apache.org/jira/browse/KAFKA-5117

If you are using Confluent Version, it should be available in 5.1.x.

https://docs.confluent.io/current/installation/versions-interoperability.html

Credentials File

Here is the credentials file couchbase.properties:

Kafka Connect Couchbase Connector – Document Expiration

Kafka Connect Couchbase Connector – Document Expiration

Couchbase supports document expiration. If the documents are ingested from Kafka through Couchbase Sink connector the expiration can be set at the connector side where we can set the expiration for each record upserted as document in couchbase.

Here is a sample configuration for the connector:

Here is a sample configuration from couchbase:

Sample Config from Couchbase: https://github.com/couchbase/kafka-connect-couchbase/blob/master/config/quickstart-couchbase-sink.properties

Securing JMX on Confluent Kafka

Securing JMX on Confluent Kafka

Confluent kafka process start with these default arguments. You can see that JMX authentication is disabled by default. This is a security vulnerability and might lead to possible issues.

Confluent kafka consists of the following services. We need to enable authentication for all of these services for JMX:

  1. Kafka Broker
  2. Zookeeper
  3. Schema Registry
  4. Kafka Rest
  5. KSQL
  6. Confluent Control Center

kafka-run-class

Kafka Broker, Zookeeper and Kafka REST use kafka-run-class. We can update it to enable authentication for JMX for these services as follows:

ksql-run-class

In order to update KSQL, you need to update ksql-run-class in bin folder of your confluent installation as follows:

control-center-run-class

On the Confluent Control Center (C3) server, following update is required in control-center-run-class:

schema-registry-run-class

Schema Registry uses schema-registry-run-class. We can update it as follows:

kafka-rest-run-class

kafka-rest-run-class is used to run KAFKA REST proxy. It can be updated as follows:

Kafka Tools – kafkacat – non-JVM Kafka producer / consumer

Kafka Tools – kafkacat – non-JVM Kafka producer / consumer

kafkacat is an amazing kafka tool based on librdkafka library, which is a C/C++ library for kafka. It means that it doesn’t have dependency on JVM to work with kafka data as administrator. It can be used to consume and produce messages from kafka topics. It also supports getting information about metadata information from kafka brokers and topics.

Getting kafkacat

The simplest way is to use docker. Confluent also has the image available on its repository. It’s also packaged and made available by others. You can find them here:

kafkacat-docker

kafkacat-docker

I have a mac. It can also be installed using homebrew. But if you don’t have development tools installed, it might show some errors as follows:

kafkacat homebrew

kafkacat homebrew

It was clear what needs to be done here. You can just install developer tools using xcode-select –install as follows:

xcode-select --install

xcode-select –install

And it goes through the steps for installation successfully as follows:

xcode-select intall

xcode-select intall

xcode-select intall -- progress

xcode-select intall — progress

Now the installation runs successfully. You can see that it also has installed the dependencies automatically including librdkafka.

brew install kafkacat

brew install kafkacat

Install jq

The outputs from the tool can also be requested in json format using -J switch. I would recommend you to install jq tool. The tool allows to pretty print the json on the console.

For Metadata

-L switch is used to get the metadata information. It can be used to get the metadata information for all topics in the cluster. You can also specify the particular topic you are interested in using the -t switch.

As Consumer

Most commonly, you might use kafkacat for consuming messages in an environment to see the details about the messages in a topic.

You can use the format expression with various parameters:

As Producer

In development environment specifically, one needs a tool to easily send messages on a topic to be consumed by a consumer service. kafkacat supports producing messages directly from the console.

It also supports loading the data from file and sending them to the topic. If we don’t use -l switch in this case, it would send the contents of whole file as one record.

Schema Registry Support

Apparently, there is still no schema registry support so please be careful with your messages in AVRO format.

schema-registry support

schema-registry support

Kafka Tools – kafka-delete-records

Kafka Tools – kafka-delete-records

While working with kafka we, sometimes, need to purge records from a topic. This is specially needed in a development environment where we just want to get rid of some records and want to keep the other ones. Previously we have discussed how we can purge all records from a topic by playing with the minimum retention configuration on it. This is useful when the records are far apart in time. Here is the reference of our discussion:

purging-data-blog

purging-data-blog

Kafka has one more extremely useful utility which also allows us to delete records. This is kafka-delete-records.sh tool. You can find it in the bin folder of your installation. Here I have Confluent Community Edition installed:

kafka-delete-records

kafka-delete-records

Let’s first create a topic my-records. The topic is loaded with messages in source-data.txt file. We have 15 lines in the file. The records are pushed to kafka using kafka-console-producer tool.

We can verify that the topic has actually been created using kafka-topics tool using –describe switch.

The tool also list number of partitions, replication factors and overridden configurations of the topic. Here is the output:

kafka-topic describe

kafka-topic describe

We can also verify that the messages are actually created by verifying the offsets of records in the topic. GetOffsetShell is another tool for this purpose. We have discussed about this previously. You can find the discussion here: http://www.alternatestack.com/development/app-development/kafka-tools-kafka-tools-getoffsetshell/.

kafka-delete-records supports and requires certain switches. This includes the cluster to connect and details about the records to delete. The records’ details can be specified in a json file passed to the tool using one of the switch.

Here is a sample format of the json file. You can note that we can even make it granular to the level of partition. Here offset is the minimum offset we want to keep. So all records before the specified offset will be purged from the topic’s partition.

Specifying incorrect topics always result in error. Here I kept the topic foo instead of my-records topic created above. Obviously, this resulted in: This server does not host this topic-partition.

Specifying non-existent partition also results in an error. Here I specified 1 instead of existing partition 0 on the topic.

Here I have played with values of offset in the json file. Please note the output:

In the end, the records did get deleted from the partition. We can verify using kafka-console-consumer tool. It appears that the tool was successful and did delete 3 records from the partition as intended.

If we need to delete all records from a partition, use -1 for offset in the configuration.

Apache Flink: History Server

Apache Flink: History Server

One of the problems we have faced running Apache Flink that we have a very limited windows for getting access to the details about failed / crashed jobs. The job details just disappear and cannot be retrieved especially form web front end. Here is how it looks like:

flink job details empty

flink job details empty

Actually we are not that helpless. Apache Flink does support keeping the history of completed jobs. We can also retrieve it. But this is not available through regular web front end. This is available through a separate server called History Server. The server is available with the regular Apache Flink package download.

history-server-shell

history-server-shell

How it works?

The history server needs a way to keep a track of all completed jobs by flink. They also include both failed jobs. Job Manager makes it easier for it. It pushes the details about the completed jobs in the specified folder in a JSON format with all details about the job including vertices, metrics, watermarks and exceptions.

Flink Storage

Flink Storage

Web front end

The History server is available as both web front end and RESTful service. Here is the default view for the list of completed jobs. It just has one tab with details about completed jobs. The web front end is on the same port under # sub-path. So if your history server is running at http://myserver:9091 then then web front end is available at http://myserver:9091/#.

HistoryServer-web

HistoryServer-web

RESTful Service

It is also available as a RESTful service. It can be accessed directly through http request. So in our case an example query can be curl http://myserver:9091/jobs/overview. We can query various end-points. The results are available in JSON format. All the end-points can be found here: [https://ci.apache.org/projects/flink/flink-docs-stable/monitoring/historyserver.html]

How to configure?

As we saw above, job manager must be configured with the same settings for completed jobs data as used by history server. Here is a sample configuration where we have used a sample file system folder to keep completed jobs data. You can see that we have used the exact same values for jobmanager.archive.fs.dir and historyserver.archive.fs.dir. You might want to use a distributed file system (hdfs) in your production environment.

The history server runs on port 8082 by default. It was conflicting with another service on my machine so I just changed the default value to 9091.

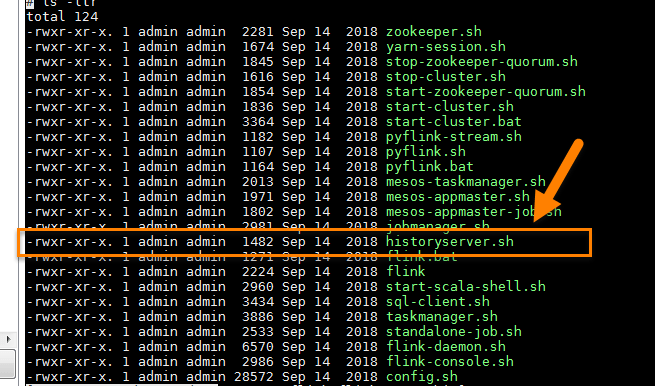
Running History Server

It’s simple to run this. You just need to use historyserver.sh in the bin folder of the downloaded package. This is a very simple shell script which uses flink-console.sh or flink-daemon.sh depending on how you want to run the server. For development purposes, you might want to try and see if the server is running successfully before starting it up as daemon.

In order to run it as daemon use start, otherwise, uses start-foreground to start the server. You can use stop switch to stop the server. It just assumes that you are using flink-daemon to run it and passes the relevant switches to stop it.

Possible Issues

While setting it up, you might run into some issues. Here are the two most common ones:

Missing Archive Directory

I missed setting the archive directory first time. Starting without setting the property results in the history server not being able to startup. You should get the following error:

Missing File Scheme

It is also required to specify the file scheme. I also missed it and got the following error:

Confluent Hub Client

Confluent Hub Client

Confluent Hub is an online repository for extensions and components for Kafka. Kafka is based on extensible model for many of its services. It allows plug-ins and extensions which makes it generic enough to be suitable for many real world streaming based applications. They include both Confluent and 3rd party components. Generally, you would go there to search for components including:

  • Connectors
  • SMT (Single Message Transforms)
  • Converters

Since you wouldn’t be changing the serialization a lot, you might find yourself search connectors and SMTs on this repository most of the time.

Confluent Hub obviously have a web page where you can go and search for the component you might be looking for.

Confluent Hub Web

Confluent Hub Web

Confluent Hub CLI

There is also a CLI available with the latest versions of Confluent Enterprise. You can find it in bin folder of the installation.

Confluent Hub CLI

Confluent Hub CLI

But if you have a community edition, the CLI can also be downloaded as a tar ball. Just make sure that your confluent installation and confluent hub packages are added to PATH environment variable.

PATH

PATH

Here is the command we can use to download the components. Please note that there are switches to specify the component’s download directory. You can also note that there is an additional switch to specify the worker’s properties file. This is to ensure that the plugins details are updated so connector service can use the component from the specified directory.

The complete list of command’s switches can be found here:

Command reference

Command reference

And the component does get downloaded to the specified directory.

Installed component

Installed component

You can see that the worker’s properties file specified has also been updated with the details where the component has been dowloaded and can be used from:

Possible Configs Issue

Although the confluent tutorials suggest to run the installation command directly providing just the component’s details but there are other switches too, some of them seem mandatory.

Configs issue

Configs issue

Posting components to Confluent Hub

You can certainly post your connectors and other components to Confluent Hub and make it available to community once approved. Further details about such postings can be found here:

Contributions to Confluent Hub

Contributions to Confluent Hub

Of course, you need to build the component before you can upload it. There are some specifications for building such components. The details can be found here:

Component Archive

Component Archive

Issues with Running Elasticseach from Command Line on Linux – bootstrap checks failed

Issues with Running Elasticseach from Command Line on Linux – bootstrap checks failed

I ran into some issues running Elasticsearch on Linux. The issues and solutions might be of some use for others.

vm.max_map_count [65530] is too low

If you are getting the following error:

Then you can resolve it by increasing the max_map_count to the suggested value for the vm option using sysctl. But you need to run it as root.

Max File Descriptors

Here is the error you might see:

In order to resolve this, we can update the following for the user in /etc/security/limits.conf.

Reference:

https://it.megocollector.com/linux/elasticsearch-bootstrap-checks-failed-resolved/

Removing Confluent Kafka from RHEL7

Removing Confluent Kafka from RHEL7

Confluent packages can simply be removed the same way they are installed. We can download the package and run the services separately. But if you have it installed through yum, it can be as easily removed. Here we are removing it using yum remove command.

yum-remove

yum-remove

After getting a confirmation, it erases the installed components as follows:

is_ok

is_ok

As the older version is removed, we can get the new packages and directly run it. Here we have downloaded the whole package and running it using confluent CLI directly from bin folder:

confluent start

confluent start

com.esotericsoftware.kryo.KryoException: Unusual solution upgrading Flink

com.esotericsoftware.kryo.KryoException: Unusual solution upgrading Flink

While upgrading from Flink from 1.4 to a newer version 1.6.1, there are a few build issues. After we fix the issues, suddenly we started getting KryoException. Why are we getting this and how it this related to the upgrade? Let’s start with the exception message. If you try to start the job a few times and you have a few Source tasks, you would find it failing at different stages each time. That is based on the data received by Source tasks from topic. Here we are using Kafka source in Flink.

The biggest issue was the code ran fine in IntelliJ but as we run it in a cluster, it throws this error.

And restarting the job, it started throwing error another schema missing.

There are a number of solutions recommended by different developers and some of them have worked in certain cases.

Disabling Kryo fallback
Flink allows us to disable Kryo fallback. Here are the details:
https://ci.apache.org/projects/flink/flink-docs-master/dev/execution_configuration.html

But this didn’t work for us. We still kept getting the same errors as we run the job.

Solution

The solution was not to package the flink runtime libraries with the fat jar package built using sbt assembly. We can do that by adding dependencies as follows: