Author Archives: Muhammad

Scala Macwire: Inject all Implementations of a trait for factory pattern

Scala Macwire: Inject all Implementations of a trait for factory pattern
Macwire is an amazing DI (Dependency Injection) container for scala. It allows to wire up the dependencies required by a type to instantiate itself as long as the type is registered with it.

If you are coming from C# background and are used to Unity framework then you must be used to register interfaces and implementations with Unity. Macwire is a bit different as we don’t need to provide such bindings. It automatically detects the binding between a trait and concrete type as long as the concrete type is registered with the macwire framework.

While implementing factories, you might be used to inject all the implementations of an abstract type (interface) in the factory constructor. Unity allows such injections if it finds more than one implementation of an interface. The problem with macwire is that it doesn’t automatically allows such injections. This is because of the way it works. It keeps a track of the registration in the current context and traits implemented by these registrations. If there is a request for injection a trait implementation in the constructor of a type being constructed, it just looks at these registration and injects the appropriate concrete type implementing the trait.

Macwire allows multiple registrations of concrete types even if they implement the same interface but it cannot directly inject them all even when a construction requires a collection of trait implementations. Au contraire, it results in a compile time error. In this post, we are trying to find a solution to this problem.

Let’s first add the macwire dependencies to our sbt file. It would make sure that the necessary libs are copied in your build.

As you compile it, you should be able to find these libraries in the External Libraries section of your project.

macwire

macwire

Now let’s introduce a trait named Operation. Here we have two implementations of the trait. They OperationFirst and OperationSecond. The trait requires implementation of a method execute. It also requires a field operationType identifying the type of operation. This can be used by factory responsible to provide Operation based instances.

OperationFactory provides an instance of an object of a type implementing Operation trait. It uses key to determine the required Operation type. In case, it is not able to find a type for the specified key, it throws a IllegalArgumentException.

We need to wire up these types using Macwire. Here MyModule is using Macwire’s wire[T] to register these types. As discussed above, it actually results in the binding between these types and traits implemented by these types. Here we are registering OperationFirst and OperationSecond, which should define their binding with Operation trait. We are also registering OpertationFactoryImpl. The module just has one public property. Accessing the property should result in the creation of the whole object graph from Macwire.

In the code below are getting the OperationFactory object from MyModule instance. We are trying to get an operation by providing “first”, “second” and “third” as keys for the factory. It looks like the code should work fine for “first” and “second” where factory can provide the OperationFirst and OperationSecond instances respectively. Since it is not able to find an implementation of Operation with “third” as OperationType, it should result in an exception. The code catches the exception and prints its message.

As we compile the code, the compiler claims for the required implementation of List of Operation based types. Actually Macwire is trying to find any such registrations. Since it is not able to find such registrations, it is resulting in this compile time failure. Yes, more than one registrations of type implementing Operation trait is of non help to Macwire.

MyModule_Error

It is actually very simple to fix. Since it is trying to find a List of Operation in the current context, we can provide this with it. Here we have just created a List of all wired up instances of Operation types. We can keep it lazy.

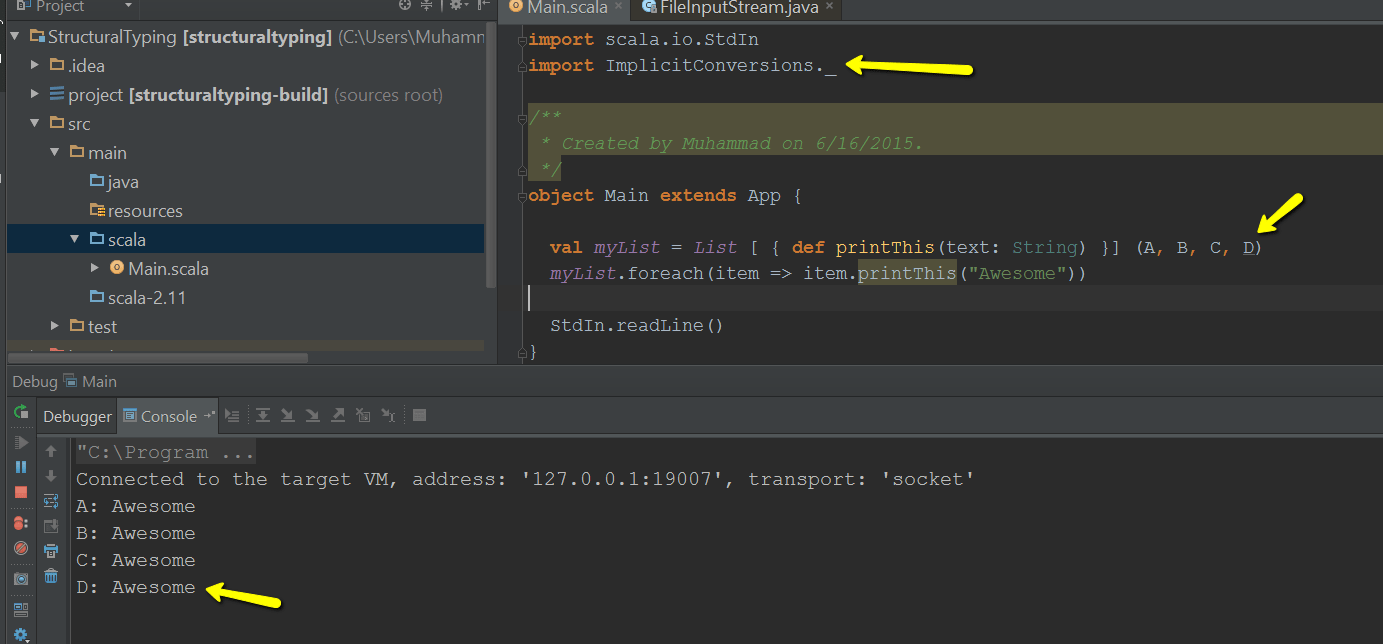
Now the code compile fines and behaves as expected when we debug it.

console_messages

Zindabad!

PartialFunction (Partially defined functions) In Scala

PartialFunction (Partially defined functions) In Scala
A partial function is a unary function which is only defined for certain domain (i.e. input) values. They can be introduced anonymously. They can also be defined using PartialFunction trait.

In order to understand partial functions, first introduce a type Student. It has three properties, id, sType and name to keep information about identity, type and name of a student.

As discussed above, we can define partial functions anonymously or using PartialFunction trait. In the following example we have introduced two partial functions, fullTimeStudentNameFunction and partTimeStudentNameFunction, which would return the name of a full-time or part-time student respectively. Here we are also using the function to get the name of the student provided.

Debugging the above code provides the correct result and we get the name of students from their respective functions.

Partial Function output

Partial Function output

Since a partial function is defined for only certain input values. A non-supported input results in a run-time failure as follows:

Scala Match Error

Scala Match Error

Partial Functions usage in Scala’s collection API:
Scala’s collection API specially has a few methods which need partial functions for their operation. Just look at the intellisence in IntelliJ Idea. Here andThen and collect methods expect a partial function to work on items in the collection.

Partial Functions & Collections

Partial Functions & Collections

collect method filters and maps the element passing the filter. It is more concise than providing the definition of both filter and map functions.

Here is the output of the above code. It filters and maps correctly. We are using the result to print the names of the students.

fullTime_partTime_output

Let’s compare the results by providing a separate definition of filter and map. We can see that the results are the same in both cases.

Filter with Map & collect

Filter with Map & collect

Using Partial Functions with Map

Although a partial function can be used with collection’s map function but if there is an input which is not supported by the partial function, it results in the same match-error.

partial_funcs_with_whole_domain

Chaining Partial Functions

Partial functions can also be chained using andThen and OrElse. In the following example, we are chaining two partial functions to support the whole domain of student types.

partialFunctions_fullDomain

Zindabad!

Partially Applied Functions in Scala

Partially Applied Functions in Scala
Partial applied functions allow us to set any parameter of a function. After partial functions, a function is created with the remaining parameters of the function. In this post we are going to discuss the details about this feature.

Let’s create a function which accepts three parameters. It uses the arguments for an algorithm and returns the result of the calculations.

Scala allows us to fix any argument, no matter its placements in the parameters list. Here we have a partially applied function add1 with its second argument fixed to 2. A partially applied function can further go through the same process creating more refined partially applied functions.

Just look at the definition of add2, which is created by fixing the first argument of add1. Now add2 is a Function1, which just uses the argument as the third parameter value. It just applies the previously fixed values for the calculation and the returns the result.

We can also use add1 as a Function2 e.g. sum2. We can just provide the values for the remaining arguments to get the result of the calculation.

Partially Applied Functions

Partially Applied Functions

Zindabad!

Currying in Scala

Currying in Scala
In our .net blog [shujaat.net], we have discussed about currying in details. Just to quote from there:

Currying is a transformation technique in functional programming space. It is used to convert a function with multiple parameters to a set of functions with single parameter each. It can be used to create refined algorithms where partial list of arguments can be provided to create more sophisticated operations. The nomenclature is in the honor of Haskell Curry, the creator of Haskell functional programming language. It must be remembered that the end-result of a curried version of a function should exactly be the same as its non-curried counterpart.

Let’s consider a simple function. The function has three parameters of type Double. It just adds them and returns the result. We don’t know how this function was implemented as such but just think of it as a given and it would ease the pain 🙂

Unlike C#, Scala has an in-built support for currying. You can just call curried on a function definition and get your function to its curried counterpart, which is a series of single arguments functions. In the following image, we are calling curried, and hey look at the intellisense. It clearly shows what it would do to our function. It would convert add into a series of single parameter functions of Double type. At the end, it would return the result, which would also be of Double type.

addCurriedIntellisense

Let’s use the curried version of our add function. Every function in the series of functions results in another Function1 except for the last one, which result in a Double type.

Let’s see exactly, how this series is being used by scala. Look at the transformations into different Function1 (s) and see how sum is assigned a value of type Double.

debug_curried

The opposite of currying is un-currying and scala definitely supports it. Here we are converting our curried add function back to its uncurried format. It accepts three parameters of double type and returns a result of type Double.

What about currying and method overloading?
For currying, it seems impossible to support function overloading in scala based on the syntax we discussed above. Scala has another syntax for currying where we just specify the number of arguments. We can use that syntax for currying in case of overloading. Although there is more typing involved with using that syntax, but that is the only way, unfortunately 🙁

This syntax is practically equivalent of the syntax we discussed above. This works in case when we don’t have an overload. In case of an overload, we have to declare it like a partial function (discussed later), otherwise, we get the following compile time failure:

error_currying_withOverloads

Here we have two add functions with different parameters list. Here we need to specify the details of the parameters if we are to generate the curried versions.

Structural Sub Typing in Scala

Structural Sub Typing in Scala
Structural typing is compile time checked duck-typing. It allows us to specify the characteristics of a required type instead of an actual concrete type. Let’s create a new SBT project ScalaTyping. In this post we are going to discuss how Scala supports structural sub-typing. Let’s create a simple Scala SBT project.

Create SBT Project - Structural Typing

Create SBT Project – Structural Typing

Let’s introduce three types A, B and C. They are defined as singletons. They don’t share a common inheritence hierarchy. But they have one thing in common, all of them have printThis method defined.

These types have structural similarity which might or might not be semantically similar. What if we just need to use printThis method from objects of these types. Structure typing allows us to introduce code which is based on certain code structures. Scala’s structural typing allows us to introduce such behavior. In the following code, we are creating a List of objects which follow a certain structure. They must have printThis method available with the specified signature. Since A, B, and C fulfill this criteria, we can add their objects to the collection.

Let’s compile and run the code now. We can notice that the code compiles successfully. The correct methods of A, B and C are being called and messages are being printed after being formatted as specified in the individual methods.

Structural Typing Simple - Output

Structural Typing Simple – Output

This is only possible because of support of structural typing by scala. Otherwise, in a nominal typing system, in order to use these types in this fashion, they must inherit from a common super type with the required signatures. This makes it difficult when we are using these types from a third-party library supporting no extensions.

Structural Typing with Implicit Conversions

Now let’s introduce one more important aspect to this discussion by taking this one step further. How can we still use this when we want to use a type which doesn’t have such structural similarity. Here we have another type D, which is not structurally similar to the other types. This can be an example of a type which we might have from some other library. This is possible that the type is structurally not similar but semantically very similar. It has other methods which can be mapped to the required definition of our structured type.

The type has a method printOnce, which is very similar to our structural requirement for the collection. We just want the method to be used instead of printThis. But if we add D to the same collection, the scala compiler doesn’t seem very happy. This is simply checking the structural type similarity, which D doesn’t clearly have.

Type D - Compilation Error

Type D – Compilation Error

We can get around this with using implicit conversion discussed in the previous post. Here we are introducing the implicit conversion between a type with printThis to a type with printOnce. We are also specifying what should be done when printThis is called, it would just call printThis method passing through the arguments passed.

After introducing the above implicit conversion, just make sure that you have your import statement right. When we run the code now, it correctly uses printOnce method following the implicit conversion. Compiler is also happy because of introduction of this implicit conversion.

StructuralTyping_Fixed

Zindabad!

Views / Implicit Conversions in Scala

Views / Implicit Conversions in Scala
Scala supports implicit conversion by providing the support for implicit methods. In this post we are going to discuss briefly about this feature. Let us first create a Scala SBT project. We are naming the project as ScalaImplicits.

Scala Implicit Conversion

Create Project

Let’s add a type Student. It is a case class with two properties. They are Id (int) and name (String).

Now let us provide an implementation of App. In the example below we are trying to instantiate a Student by assigning a string text to it. Off course, we cannot do that. We need to instantiate it by providing the values of id and name. Is this possible to just assign a string like this?

Building your code, would result in a compile time error. How can we still make it work?

compiler_error

Scala has an amazing implicit conversion feature. This is how it works. We need to provide a method definition using implicit keyword. In this method, we specify the details how such conversion should take place. Here in the example below, we are converting a text to Student object. The text is provided colon-separated in the format (id : name).

Now we just need to import the namespace with the object name wherever we need to use this conversion. This would help compiler figure out how to handle such conversion. Now the compiler should be happy!

implicit_import

Apache Thrift And its usage in C#

Apache Thrift And its usage in C#

Services are based on the idea of RPC (Remote Procedure Calls). Apache Thrift is just another framework allowing us to write services but it makes it easier to write them by enabling polyglot development.

Apache Thrift enables writing cross language services development.

Why do we need Apache Thrift

One of the benefits of using thrifts is Data Normalization. If the services are implemented in different languages, there is no way a client can send an object which could be picked up by the receiver and she understands it unless it is serialized into a universal format understood by both.

The most famous universal formats for polyglot application development are JSON and Protobuf.

JSON is an excellent choice but there are problems with using JSON specially when we need compile time checking. Most of the time we end-up generating types in C#, Java or language of your choice to convert JSON into the object type. This is an extra work repeated for each project.

Protobuf allows us to write type definitions in a standard format in *.proto files. There are tools available to generate types for your language (Java / C# / Python) based on these definitions. But Protobuf is not a service framework. We need another framework to host services for us like WCF or a REST based framework.

Apache Thrift, on the other hand, provides support of serialization / deserialization in the format of our choice. It also provides a framework for hosting our services.

How Apache Thrift Handles it?

“All problems in software are solved by adding a layer of indirection”. Here the layer of indirection is introducing an Interface Definition Language, commonly referred to as IDL. This is used to define the types which we need to send on the wire. These are just like WCF data contracts but they are defined in a different syntax, plus this would be used to generate codes for different languages. We can then use thrift compiler to compile these types into the language of our choice. The compiler generates the source code for these types with complete serialization / deserialization logic. You can just add this code to your project.

Apache Thrift Interface Definition Language (IDL) compiler

Thrift IDL Compiler

Serialization Formats

Apache Thrift supports a number of serialization formats. They include:

  1. Binary: For better speed
  2. JSON: for readability of serialized objects
  3. Compact: For reduced size

Apache Thrift Services

Thrift also allows services to be defined in the same IDL formats. They can then be implemented in the languages of your choice. These services can then be hosted by one of the servers provided. The available servers are as follows:

  1. TSimpleServer
  2. TThreadedServer
  3. TThreadPoolServer

All of them inherit TServer available in Thrift assembly.

In the service oriented scenario, first you would be defining all type used across the boundaries in IDL format. Now you can use Thrift compile to generate code for the languages used by clients and service. You can add the code generated for client in the client project. We also need to add logic to send message to the service.

Now you can implement service in the same IDL format. Again, we need to compile it into the language used for server implementation. Now we can use a server provided by thrift library to host this service. All the stage is set. When we call service methods. The client code serializes the objects using thrift logic, sends it over the wire to the Thrift service. On the service side, thrift deserializes the message and pass it to the server code.

Now let us compile the code into the language of our choice. Thrift compiler can generate code in a number of languages including CSharp (support for .net CLR), Java (support for JVM), Python, Java Script and a number of other languages. Here we are generating code for CSharp. Thrift creates a separate folder for each language. You can notice a folder gen-csharp, which contains the generated client and server code for csharp for the IDL service used.

thriftCompiler_run

Primitive Types
IDL has a number of available primitive types. They are as follows:

  1. bool: A boolean value (true or false)
  2. byte: An 8-bit signed integer
  3. i16: A 16-bit signed integer
  4. i32: A 32-bit signed integer
  5. i64: A 64-bit signed integer
  6. double: A 64-bit floating point number
  7. string: A text string encoded using UTF-8 encoding

There is no default DateTime type available in thrift. But we can always keep the value of the DateTime in a standard numeric or string format and parse it on the other end of the service.

Required / Optional Fields
Abstract Data Types (classes) are defined in thrift using struct keyword. They can include primitive, enum and other struct types. All the fields are required (by default). Using ‘optional’ keyword is used to define non-required fields. All non-optional fields are added as constructor parameters of a type, which makes sense as if it is a required field then it is not possible to construct an instance without specifying the field’s value.

Apache Thrift Nuget Package

In order to use Thrift client or server, we first need to download the package required to handle thrift framework. For .net framework, the package is available as a nuget package.

Apache Thrift Nuget Pacakge

Apache Thrift Nuget Pacakge

Implementing Thrift Server in C#

The generated code in C# has an interface Iface with the signatures we specified in the service definition IDL file. We just need to implement the interface to provide service definition. But first we need to add the generated code in our C# Server project.

MyThriftService_server_proj_add

Now we can just provide the implementation of Iface interface to implement described service.

We need to host the service. As we discussed above, Thrift provides us the servers to host the generated services. Here we are using the above implementation of the service hosting it on port 9090. We are using TThreadPoolServer to host our service.

Implementing Thrift Client in C#

A thrift service hosted can be consumed by any client irrespective of the language as long as a generator is available for it. Since we want to consume the service in C# too, we can just add the same generated code to the client project as well. I would recommend to keep it in the same folder and reference the code as a link in both client and server projects.

Thrift Client C#

Thrift Client C#

Now we need to use the service to get the result of our requests. We can provide the following simple code to use the above service.

Now we just need to run the service. As we run the above client, the service provides the following responses, which we are formatting and printing to the console.

output_result

Download Code

Observables in Javascript

Observables in Javascript
Observable pattern allows us to execute code blocks when a change happens. There are different implementations to support observables in different programming languages. In ECMAScript 6, Object.Observe() was introduced for the same purpose. It allows us to write functions which get called when an object’s properties are changed.

Let’s look at the following code block. It declares an object model and adds and assigns two dynamic properties to the object. They are id and name. It also uses Object.Observe() with an anonymous function to use the changes in the model object.

Let’s look at how this gets executed. In Chrome, the changes are passed to the change function. Here we are just writing it to the console.

chrome_observable

So this was Chrome. Apparently, Internet Explorer still doesn’t support this feature. Here we are loading the same page in Internet Explorer 11. See how it throws error.

ie_observable

So what should we do in such cases as we don’t want Internet Explorer users to be deprived of our wonderful web page. Apparently, people have been thinking about it. Here is a library ObserveJS which allows us to do the same thing. It exploits Object.Observe() if the browser supports so, otherwise, it uses some other implementation.

polymer_observeJS

Variable hoisting in Javascript

Variable Hoisting in Javascript
If you are coming from C# or Java background into C#, you might find scopes as very strange in java script. In this post, we will be trying to understand the scopes in C#. Specially, how javascript uses hoisting to for these out-of-ordinary scopes.

In other programming languages, we limit the scopes by introducing some explicit or implicit BEGIN and END markers (curly braces {} in C# / Java & indentation in Python). Since syntactically, javascript is Cish, it also has those curly braces. If you are coming from the background of C’ish languages, you might assume that they would limit the scope.

Let’s see the following code:

Here we have added a variable internaVar. We have tried limiting scope of the variable by keeping them inside the statement block. We are trying to access the block’s local variable outside the statement block. You might assume that this should fail at compile time. Well we don’t have that luxury in javascript. Actually the code still runs. If you add a breakpoint in chrome, you might see something like this:

hoistedInternalVar

The variable not only has it’s lifetime by maintaining the value assigned in the scope, it also has visibility outside the statement scope. So what is going on? Actually, this is a feature of java script called Variable hoisting, where it finds all declarations within a function and move them at them at the start of function. Since javascript has caused the declaration of internalVar in the function scope, it is available throughout the function, hence maintaining its lifetime and visibility.

How to avoid this?
In order to avoid this, we can use javascript lint library (jshint). Let’s move this code in a javascript (lintEx.js) file first, and remove all document.writeln methods. Linting allows us to identify the bad parts of javascript and gives suggestions to avoid the unexpected.

Now let’s install node module for jshint using node package manager (npm).

npm_install_jshint

As we run the jshint tool for our javascript, it recognizes the issue and notifies us to fix the usage of a local variable out of our intended scope.

jshint_scope

Best Practice
Since javascript doesn’t recognize a local scope, I think we should avoid declarations in a local scope. It’s like assembly where we have separate data segments. We can do all declarations in the beginning of the function and use the variables throughout the function. This is obviously different than our regular use of variables where we like to declare them in the least possible scope.

Unit testing Javascript using Karma & Jasmine

In this post, we will be trying to understand how we can unit test javascript code using Karma and Jasmine.

Karma

Let’s first install Karma. It is available as a node package, so we can use npm to install it.

mehrofiq

Here we are using Karma for running our unit tests. Karma launches a web server that executes the test code against connected web browsers. The tests can run manually or it can also watch files, matching certain grep pattern. After running tests, it can show the results in the command line console. You can read more about karma here.

karma_web

Jasmine

We will be writing our tests using Jasmine for writing unit tests. It provides an easy to use framework for introducing javascript tests.

install-karma-jasmine

Further info about Jasmine’s unit testing features can be found here:
jasmine_further_info

We also need to add support to run it in a browser. Here we are installing chrome launcher for karma.

karma-chrome-launcher

After installing the above packages, you should have a folder created node_modules containing the following packages.

installed-packages

npm – Node Package Manager

Here we are using npm to install these node packages. If you don’t have it installed already, you can get it directly from npmjs.com.

npm-install

Configuring Karma

Now we need to configure karma to run the unit tests. This can be used to automatically set karma to watch files matching certain grep pattern. Here we want to watch all javascript files in the current folder. We will be using jasmine and would be using chrome to run our tests.

configuring_karma

After the above configuration, you should have the following file created in your folder.

karma_conf_js

Writing Unit Tests

Let’s see below how easy is to write our first unit tests. We need to group the tests in describe blocks. Each test is blocked in it blocks. The assertions are added using various expect features provided by the framework.

Running Tests

Before running the tests, we first need to launch karma. If you have followed the above steps, it should also launch chrome and connect it to the karma.

karma_start

Now the server is continuously watching the folder. It would run the test if a new javascript file is added to the folder or an existing file is updated.

test_run

Zindabad!